
Do you ever open your fruit bowl and find those bananas have gone from bright yellow to seriously spotty? I know that feeling well. It’s a little moment of kitchen inspiration, a gentle nudge to create something warm and comforting.
After years of testing different versions, this particular creation has become my absolute favorite. It’s the one I make for cozy weekends and to share with friends. What makes it so special is its incredibly moist texture and foolproof simplicity.
This method relies on those super ripe bananas for natural sweetness. You’ll be amazed at how little added sugar you need. The best part is the incredible aroma that will fill your home as it bakes.
Whether you follow a plant-based lifestyle or are just curious, this loaf is a true delight. It’s not just a good alternative; it’s genuinely the best version I’ve ever tasted. It honors that nostalgic, homestyle tradition we all love.
Introduction: Embracing the Vegan Twist on a Classic
There’s something magical about transforming simple ingredients into a comforting treat that feels like home. I remember my early baking days, standing on a stool beside my mother as she mixed batter for our family’s weekend treats.
A Nostalgic Yet Fresh Perspective
In my experience, adopting a plant-based lifestyle doesn’t mean saying goodbye to the foods you love. It actually opens up exciting new possibilities for familiar favorites.
Many people worry that egg-free and dairy-free versions might lack flavor or have a strange texture. Let me reassure you—this couldn’t be further from the truth with the right approach.
Ripe fruit naturally works as a perfect egg substitute in baking. This creates an incredibly moist and tender crumb that often surpasses traditional versions.
Readers have shared how this particular creation changed their view of plant-based baking. One person called it their “go-to comfort food” that brings back childhood memories.
The process itself feels therapeutic. Mashing, mixing, and waiting for that golden crust to form connects us to simpler times. This method has earned its reputation through countless tests and enthusiastic feedback.
What Makes This Recipe Stand Out?
You might wonder what separates a good loaf from a truly great one. The answer lies in a few clever details that make this particular version a consistent winner.
First, the method is brilliantly simple. You mix everything in just one bowl. This means less cleanup and a more straightforward process, perfect for bakers of any skill level.
Those spotted, overripe fruits on your counter are the secret weapon. They mash easily and provide incredible natural sweetness and moisture. This allows you to use far less added sugar than traditional versions.
The formula is also wonderfully adaptable. You can use oil, plant-based butter, or even applesauce for an oil-free option. I’ve tested it with various types of flour, and the results are always fantastic.
This creation is also freezer-friendly. You can bake a batch and save slices for later, ensuring a wholesome snack is always ready.
Most importantly, this method has earned rave reviews from countless home cooks. Its reliability and delicious outcome are what truly make it special.
Essential Ingredients & Substitutions for Success
Let’s talk about the building blocks that make this creation so reliable and delicious. You really don’t need anything fancy. Good pantry staples and those spotted fruits on your counter are the true stars.
Bananas, Vegan Butter, and Natural Sweeteners
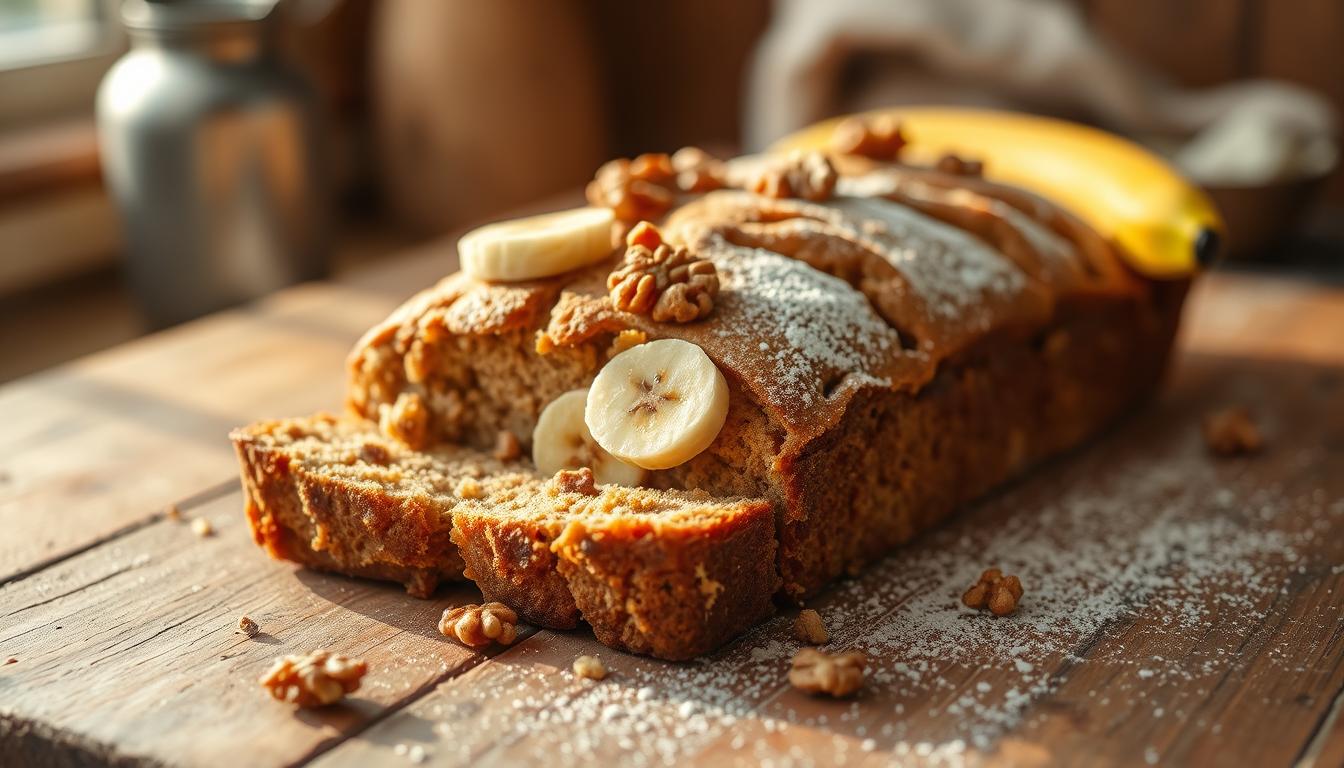
Your fruit should be super ripe. I’m talking heavily freckled, very soft, and with peels that are almost black. This ripeness is crucial for the best flavor and a wonderfully moist texture.
For the fat, you have great options. A half cup of vegan butter at room temperature, like Miyoko’s or Earth Balance, creams beautifully. Alternatively, one-third cup of a neutral oil works just as well.
When your fruit is perfectly ripe, you need surprisingly little added sugar. Between one-third and three-quarters of a cup of brown sugar adds a caramel depth. Pure cane sugar keeps it lighter.
Flour, Baking Soda, and Leavening Agents
One and three-quarter cups of all-purpose flour is my go-to for a foolproof result. Feel free to substitute whole wheat for nuttiness or a gluten-free blend with minor adjustments.
The leavening is simple but important. Baking soda helps with browning and reacts with the fruit’s natural acidity. Baking powder provides the main lift for a perfect rise.
Don’t be afraid to get creative with add-ins. Toasted walnuts add a fantastic crunch. Chocolate chips create decadent pockets. Shredded coconut brings a lovely tropical flair.
My best substitution tip? Applesauce can replace oil for a fat-free version. A little plant-based milk adjusts the batter’s consistency perfectly.
Your Go-To Vegan Banana Bread Recipe
Now comes the most rewarding part – watching your ingredients come together in the pan. This straightforward process delivers consistent results every time.
Overview of Preparation Steps
Begin by preheating your oven to 350°F. Properly grease your standard 9×5 inch loaf pan to prevent sticking. The one-bowl method keeps cleanup simple.
Mash your ripe fruit thoroughly. You can use a fork or potato masher for this task. Leaving small chunks adds wonderful texture to the final product.

Combine all wet ingredients with the mashed fruit. Stir until everything blends together nicely. Then gently fold in the dry ingredients.
The key here is avoiding overmixing. Stop as soon as the flour streaks disappear. A few lumps in the batter are perfectly fine.
Baking Techniques for a Perfect Loaf
Pour your batter into the prepared pan. Smooth the top gently with a spatula. The baking time typically ranges from 50 to 60 minutes.
Watch for visual cues that indicate doneness. The top turns golden brown and pulls away from the pan’s sides. Your kitchen will fill with an incredible aroma.
Use the toothpick test for certainty. Insert it into the center – it should come out clean or with moist crumbs. Never remove wet batter.
Practice patience during cooling. Let the creation rest in the pan for 10 minutes first. Then transfer to a wire rack for complete cooling.
Mastering the Mixing and Baking Process
Getting the texture just right comes down to a few key techniques during the mixing stage. In my experience, this is where many home bakers can improve their results significantly.
Starting with your wet ingredients in the bowl creates a smooth base. This makes incorporating the dry ingredients much easier and ensures even distribution.
Balancing Wet and Dry Ingredients
Proper flour measurement is crucial. Use the spoon and level method to avoid packing too much flour into your measuring cup. This prevents a dense, dry result.
When you combine your ingredients, mix just until the flour streaks disappear. Overmixing develops gluten strands that create a tough texture instead of that tender crumb we want.
Your batter should be thick but pourable, with some small lumps remaining. This is actually a good sign that you haven’t overworked the mixture.
If you’re adding chocolate chips or walnuts, fold them in gently at the very end. Just a few strokes will distribute them without overmixing the base batter.
Remember that baking is forgiving. Even if you mix a bit too much, the high fruit content helps maintain moisture. Don’t stress about perfection.
Expert Tips and Tricks for Perfect Texture
The difference between a decent outcome and bakery-quality perfection often lies in the small details many overlook. I’ve learned these insights through years of testing and countless batches.
First, make sure your vegan butter is truly at room temperature. It should indent easily when pressed with your finger. This simple step creates smoother mixing and better texture throughout your final product.

Toasting nuts before adding them is a game-changer. Spread walnuts on a baking sheet and toast at 300°F for about 5 minutes until fragrant. This intensifies their flavor dramatically.
Oven temperature accuracy matters more than you might think. Even 25 degrees can affect baking time and texture. I recommend using an oven thermometer for consistent results.
Watch for visual cues that indicate your loaf is perfectly baked. The top crust should be deeply golden, almost caramel-colored. The edges will pull away slightly from the pan sides.
If your fruit isn’t quite ripe enough, pierce the peel and microwave in 30-second bursts until softened. While naturally ripened bananas taste better, this trick works in a pinch.
Never remove your creation too early from the oven. If the center isn’t fully set, the loaf will sink as it cools. Always use the center rack for even heat distribution and that perfect golden top.
Creative Variations and Add-ins to Elevate the Flavor
What I love most about this foundation is how it welcomes creative additions and flavor combinations. You can truly make each batch your own signature creation.
The possibilities feel endless when you start experimenting. This is where your personal taste preferences can shine through beautifully.
Incorporating Nuts, Chocolate Chips, and Coconut
For classic indulgence, fold in about half a cup of vegan chocolate chips. Mini chips distribute more evenly for pockets of melty goodness in every slice.
Toasted walnuts add incredible crunch and earthy flavor. Roughly chop them and toast lightly before adding to the batter.
Want a tropical twist? Shredded coconut creates a vacation-in-every-slice experience. Sprinkle some on top before baking for extra visual appeal.
A single teaspoon of cinnamon transforms your loaf into cozy, aromatic comfort food. Nutmeg or cardamom also work wonderfully for warming spice notes.
For fresh fruit lovers, diced strawberries create beautiful strawberry banana bread. Just note it may need a few extra minutes in the oven.
This same batter makes perfect muffins too! Simply reduce baking time to 25-30 minutes for portable, individually-portioned treats.
The beauty lies in how each addition enhances the base flavor profile. Your creativity is the only limit to what you can achieve.
Serving, Storing, and Enjoying Your Bread
The final, wonderful step is sharing and savoring your creation. A little know-how ensures every piece tastes as good as the first.
Let your loaf cool completely in the pan. This patience pays off with fully developed flavors and clean, easy slicing.

Ideal Presentation and Pairing Ideas
My favorite way to serve a slice is lightly toasted. The warmth releases an incredible aroma. A thin layer of almond butter makes it pure bliss.
Pair your treat with a hot drink for a cozy experience. A cup of coffee is perfect for breakfast. For dessert, try it with a drizzle of chocolate syrup.
Best Practices for Storage and Reheating
Keep your bread fresh by storing it correctly. Once cool, wrap it tightly or use an airtight container. It stays perfect at room temperature for several days.
For longer storage, freezing is a game-changer. Slice the entire loaf first. Wrap individual pieces and freeze them for up to two months.
Reheating is simple. A quick zap in the microwave brings back that just-baked warmth. A toaster oven can restore a slightly crispy edge.
Community Feedback and Personal Experiences
What started as a personal kitchen experiment has grown into something much bigger through community sharing. The responses from fellow bakers have been incredibly heartwarming.
Jen’s review captures the excitement perfectly: “Run, don’t walk to your over-ripe bananas and make this ASAP! I have stopped looking for the holy grail banana bread recipe because this is the one.” Her enthusiasm mirrors how I feel about this creation.
Paden’s creative approach shows how people make it their own: “Sooooo delicious! I used toasted pecans, added chocolate chips, and put shredded coconut on the top while it baked.” This adaptability is what makes the formula so special.
With hundreds of five-star reviews across platforms, this isn’t just my opinion—it’s community-validated. Home cooks have successfully reduced sugar, used different flours, and created muffin versions with excellent results.
The shared troubleshooting and celebration among bakers creates a wonderful support network. I’m deeply grateful to everyone who has taken time to share their experiences. Your feedback helps others feel confident trying this method.
Conclusion
Seeing those spotty fruits on your counter transform into a golden, aromatic loaf is pure kitchen magic. This particular method has earned its spot as a foolproof favorite for a reason. It’s wonderfully flexible with different types of flour and stores beautifully for days or even months.
Remember, perfection isn’t the goal. A cracked top or a forgotten pinch of salt just adds character. It will still taste incredible.
For me, this process is a Sunday ritual. It’s my go-to comfort food and a heartfelt gift for new neighbors. The true joy isn’t just in the final slice, but in the nurturing act of creating something with your own hands.
Whether this is your first try or your hundredth, you’re about to make something special. I’d love to hear about your creations and see your photos. Your spotty fruits are about to become a delicious new favorite.


